

Juicy Burger Recipe on the Stove
By Brownie Burg | Jucy Burger Recipes | 10 min read
Prep Time: 15 minutes | Cook Time: 12 minutes | Total Time: 27 minutes | Serves: 4
Let me be honest with you (The best juicy burger recipe on the stove) — I used to think a truly great burger was something only a restaurant could pull off. That golden crust on the outside, that juicy, slightly pink center, the melted cheese draped just right over the edges… it felt like a secret only professional chefs knew.
Then one Tuesday evening, I made a burger on my stovetop that completely changed my mind. No grill, no backyard fire, no fancy equipment. Just a cast iron skillet, some good ground beef, and a little patience.
That burger was better than anything I’d ordered in months.
This recipe is that burger. And today, I’m walking you through every single step — including the tips I wish I knew years ago.
Why This Stovetop Burger Works So Well
A lot of people underestimate the stove. The truth is, cooking a burger in a cast iron skillet or heavy pan actually gives you more control than a grill. You can manage the heat precisely, you get a beautiful Maillard crust from direct pan contact, and the drippings stay right there in the pan, which means every patty sears in its own flavor.
There’s also no wind. No uneven hot spots from a gas grill. Just steady, consistent heat that lets you nail the doneness every single time.
What You’ll Need
For the Burger Patties
- 1½ lbs (680g) ground beef — 80/20 fat ratio is the sweet spot. The fat is what keeps it juicy.
- 1 teaspoon salt
- ½ teaspoon black pepper
- ½ teaspoon garlic powder
- 1 teaspoon Worcestershire sauce — this is the secret weapon for depth of flavor
- 1 tablespoon butter — for the pan
For the Assembly
- 4 brioche buns — soft, slightly sweet, and sturdy enough to hold everything together
- 4 slices cheddar cheese (or American, gouda, or pepper jack — your call)
- 4 strips crispy bacon (optional but highly recommended)
- Lettuce leaves — iceberg or romaine for that satisfying crunch
- 2 ripe tomatoes, sliced
- ½ red onion, thinly sliced
- Pickles to taste
- Ketchup, mustard, or burger sauce — see tip below
Step-by-Step Instructions
Step 1: Mix and Shape the Patties — Gently
Add the ground beef to a large bowl with salt, pepper, garlic powder, and Worcestershire sauce. Use your hands to mix — but here is something most people get wrong: don’t overmix. Work the meat just enough to distribute the seasoning. Overworking the beef breaks down the fat and makes the patty dense and tough.
Divide the mixture into 4 equal portions (roughly 170g / 6oz each). Shape each into a patty slightly wider than your bun — they will shrink as they cook. Press a small thumbprint indentation in the center of each patty. This stops them from puffing up into a dome shape while cooking.
Place the patties on a plate and refrigerate for 10 minutes. Cold patties hold their shape better in the pan.
Step 2: Get the Pan Screaming Hot
Place a cast iron skillet or heavy-bottomed pan over medium-high heat. Let it heat for at least 2 minutes before anything goes in. A hot pan = a proper crust. A warm pan = a grey, steamed patty. Big difference.
Add the butter and let it melt and just start to brown. This is when you add the patties.
Step 3: Cook the Patties — Don’t Touch Them
Place the patties in the pan, indentation side up. Here’s the hardest part: leave them alone. Resist every urge to press them down with a spatula. Pressing squeezes out all those precious juices onto the pan instead of keeping them inside the burger.
Cook for 4 to 5 minutes on the first side until a deep brown crust forms and the edges look cooked about halfway up the side. Flip once and cook for another 3 to 4 minutes on the second side.
Internal temperature guide:
- Medium-rare: 130°F / 54°C
- Medium: 145°F / 63°C
- Well done: 160°F / 71°C
For food safety, especially when serving kids, aim for 160°F.
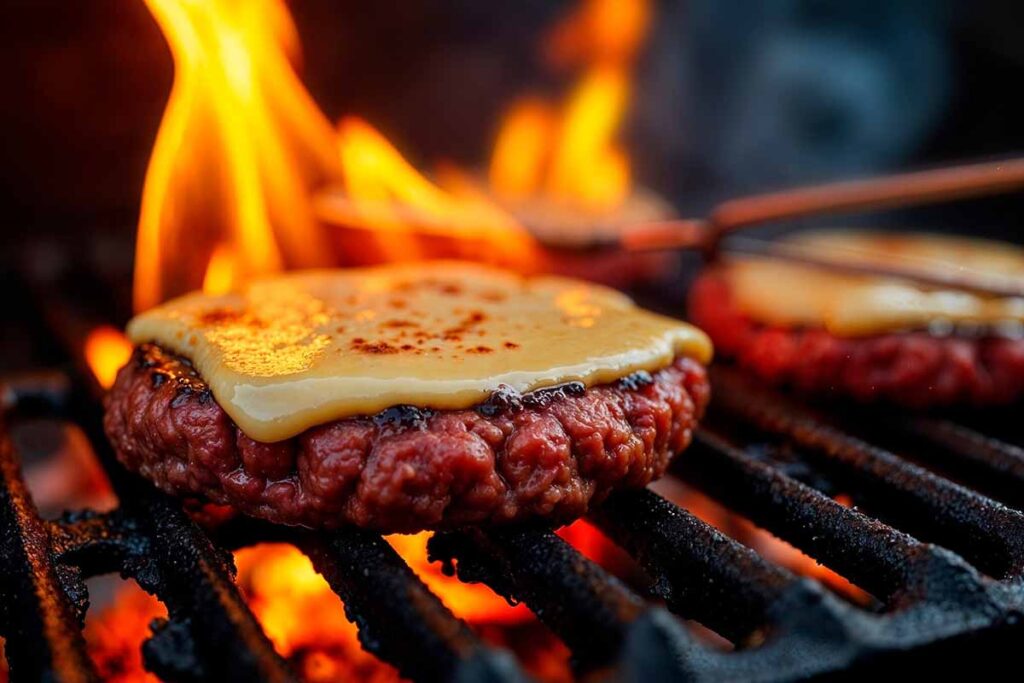
Step 4: Melt the Cheese
In the last 60 seconds of cooking, lay a slice of cheese on each patty. Cover the pan with a lid or a sheet of foil. The trapped steam melts the cheese perfectly — no blowtorch required.
Step 5: Rest the Patties
Remove the patties from the pan and let them rest on a plate for 2 to 3 minutes before assembling. This is not optional. Resting allows the juices to redistribute through the patty instead of running out the moment you bite in.
Step 6: Toast the Buns
While the patties rest, slice the brioche buns and place them cut-side down in the same pan (still on low heat). Toast for about 60 seconds until golden. That pan is full of buttery, beefy flavour — use it.
Step 7: Build Your Burger
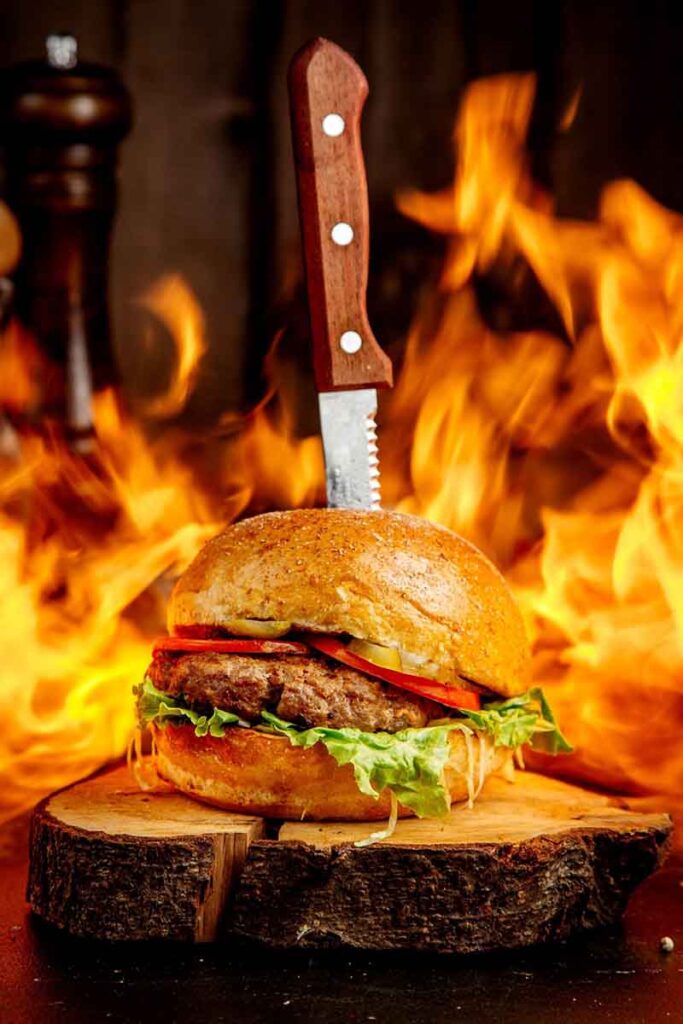
There’s actually a right order to stacking a burger. Here’s what works:
- Bottom bun with sauce
- Lettuce (acts as a barrier so the bun doesn’t get soggy)
- Tomato slices
- Burger patty with melted cheese
- Onion slices
- Crispy bacon
- Pickles
- More sauce on the top bun
- Top bun — press gently and serve immediately
The Sauce That Ties It All Together
If you want to take this burger from great to unforgettable, make a quick burger sauce. Mix together:
- 3 tablespoons mayonnaise
- 1 tablespoon ketchup
- 1 teaspoon yellow mustard
- 1 teaspoon sweet pickle relish
- ¼ teaspoon garlic powder
- A pinch of smoked paprika
Stir and refrigerate for 10 minutes before using. It keeps in the fridge for up to a week and works on sandwiches, wraps, and dipping fries too.
Tips for the Juiciest Burger Every Time
Use 80/20 ground beef. Leaner beef makes a drier burger. The fat renders during cooking and keeps everything moist. If you want a slightly healthier option, try 85/15 — but avoid anything leaner than that for stovetop cooking.
Season just before cooking. Salt draws out moisture. If you season the patties and let them sit for too long, they can become a bit dense. Season right before the pan.
One flip only. Multiple flips interrupt the crust from forming properly. Flip once, trust the process.
Room-temperature cheese melts faster. Take your cheese slices out of the fridge 15 minutes before cooking for a better, more even melt.
Brioche buns are worth it. A soft, buttery brioche bun genuinely makes a difference. It complements the savory beef without overpowering it. Potato rolls are a close second.
What to Serve With This Burger
A burger this good deserves equally good sides. Some ideas:
- Classic fries — either oven-baked or air-fried for a lighter option
- Onion rings — especially if you want to really lean into the comfort food vibe
- Coleslaw — the cool crunch is a perfect contrast to the warm, rich burger
- Corn on the cob — if you’re making this in summer, absolutely
- A simple green salad — sometimes you want the balance
Variations Worth Trying
BBQ Bacon Burger: Swap the burger sauce for smoky BBQ sauce, add caramelized onions, and use smoked gouda instead of cheddar. Absolute comfort food.
Mushroom Swiss Burger: Sauté sliced mushrooms in butter with a little garlic, pile them on the patty, and top with melted Swiss cheese. Simple and deeply satisfying.
Spicy Jalapeño Burger: Add sliced pickled jalapeños, pepper jack cheese, and a sriracha-mayo sauce. Perfect if you like a bit of heat.
Double Smash Burger: Use 85g (3oz) balls of beef instead, and when you place them in the pan, press hard with a spatula to smash them flat. Cook for 2 to 3 minutes per side. Thin, crispy-edged, and absolutely addictive.
Can I Make This Ahead of Time?
You can shape the patties up to 24 hours in advance. Wrap them individually in cling film and refrigerate. The sauce also keeps well in the fridge for up to 7 days.
Cooked patties can be stored in an airtight container in the fridge for up to 3 days, or frozen for up to 2 months. Reheat gently in a covered skillet on low heat with a splash of water to add moisture back.
Frequently Asked Questions
1. Why does my stovetop burger taste dry?
Usually comes down to two things: the fat ratio of the beef (lean beef = dry burger) or overcooking. Try 80/20 ground beef and pull the patties off the heat a little earlier than you think. They continue cooking while resting.
2. Can I use a non-stick pan instead of cast iron?
You can, but you won’t get the same crust. Non-stick pans don’t tolerate very high heat well. A cast iron or stainless steel skillet is worth the investment if you make burgers regularly.
3. My cheese doesn't melt properly. What am I doing wrong?
The pan probably isn’t covered when you add the cheese. Cover with a lid or foil and the trapped steam melts cheese in under a minute.
4. How do I stop the burger from puffing up in the middle?
Press a small thumbprint indent into the centre of each raw patty before cooking. That small dip counters the natural tendency of the meat to contract and puff upward.
5. What's the best beef for burgers?
Ground chuck with 20% fat is widely considered the gold standard for homemade burgers. It has the right fat content, the right texture, and it holds together well without needing binders or eggs.
Final Thoughts
The perfect stovetop burger isn’t complicated — it just requires a few good habits. Good beef, a hot pan, one clean flip, and a little patience while it rests. That’s really it.
Once you get comfortable with the basics, you can start playing — different cheeses, different sauces, caramelized onions, fried eggs on top. The burger is one of those rare recipes that rewards both the beginner who follows it step-by-step and the experienced cook who likes to improvise.
Give this one a try on your next weeknight. I think it’ll surprise you.
Enjoyed this recipe? Check out more on Brownie Burg:
- Best Juicy Bacon Cheeseburger
- Crispy Homemade Samosa
- Spicy Thai Seafood Salad
Nutrition (per serving, approximate):
Calories: 620 | Protein: 36g | Fat: 38g | Carbohydrates: 30g | Fiber: 1g | Sodium: 890mg
Values based on standard ingredients. May vary depending on toppings and bun choice.
Published on Brownie Burg — Your home for real recipes, honest reviews, and food worth making.